Table of Contents
If you are asking how to prepare a concrete slab, you have already realized the most important rule of masonry: concrete is only as good as the ground it sits on. In the Lower Mainland, we face challenges that most online guides simply ignore — heavy seasonal rainfall from October through March, dramatically varying soil types from Richmond’s compressible silt to North Vancouver’s bedrock, and freeze-thaw cycles that can destroy an improperly prepared slab in a single winter.
A poorly prepared base leads to two types of failure. “Settlement cracks” occur when the slab sinks into soft spots left by organic material or uncompacted soil. “Heaving” happens when moisture trapped under the concrete freezes, expands, and pushes the slab upward. Both failures are expensive, both are preventable, and both trace back to the work done before a single yard of concrete was ever poured.
Whether you are pouring a simple garden shed pad or a full residential driveway, this guide will walk you through every phase — from breaking ground to the final cure. Vancouver Ready Mix serves residential projects of every scale across the Lower Mainland, and this is exactly how we recommend every project begins.
Concrete SlabExcavation Calculator
Get your exact excavation depth, gravel, and concrete volumes before your truck arrives.
Fill in your details and hit Calculate
Phase 1: Planning, Scope, and Your Tool Checklist
Before you break ground, you need to define the project’s scope. Are you building a simple garden shed base, or a heavy-duty driveway designed to hold a loaded pickup truck? The answer determines slab thickness, excavation depth, gravel depth, reinforcement type, and ultimately how much concrete you need to order.
Define Your Slab Specs First
| Slab Use | Recommended Thickness | Reinforcement |
|---|---|---|
| Garden path / walkway | 3–4 inches | Wire mesh |
| Patio / shed pad | 4 inches | Wire mesh |
| Garage floor | 4–5 inches | #3 rebar or mesh |
| Residential driveway | 6 inches | #3 or #4 rebar |
| RV pad / heavy load | 6 inches | #4 rebar, 12″ grid |
Once you know your thickness, use the Vancouver Ready Mix concrete calculator to determine exactly how many cubic yards you need before calling to schedule delivery. Over-ordering is wasteful; under-ordering on pour day is a crisis.
For smaller projects under 1 cubic yard — a fence post base, a small landing pad, or a patch repair — a U-Cart concrete unit lets you mix precisely what you need without booking a full truck.
The Complete Tool and Material Checklist
Tools:
- Round-point and flat spades
- Pickaxe or mattock (for rocky North Vancouver sites)
- Gas-powered plate compactor (rental strongly recommended — a hand tamper is not sufficient)
- Laser level or string line and line level
- Circular saw for cutting lumber forms
- Screed board (2×4 or purpose-made aluminum screed)
- Bull float and hand floats for finishing
- Rubber mallet for staking
Materials:
- 2×4 or 2×6 dimensional lumber for forms
- Wooden or metal stakes every 2–3 feet
- 3/4-minus crushed gravel (not pea gravel or drain rock)
- #3 or #4 rebar, or welded wire mesh (6×6 W1.4×W1.4)
- Rebar chairs or “dobies” (plastic or concrete spacers)
- 6-mil polyethylene vapor barrier (for interior slabs)
- Tie wire and wire cutters
Phase 2: Excavation — Remove Every Organic Layer
The “ground” is not just dirt. It is a living ecosystem of grass roots, decaying organic matter, worm channels, and microbial activity. All of it is compressible. As organics decompose over years, they create voids. A slab poured over organics will eventually bridge those voids, flex under load, and crack from the inside out.
How Deep to Dig
For a standard 4-inch residential slab, target 8 inches of total excavation depth — 4 inches for compacted gravel and 4 inches for concrete. For a 6-inch driveway slab with 6 inches of gravel, you are looking at 12 inches total.
- Dig 6 inches wider than your finished slab on all sides. This “over-dig” gives you room to set and stake your forms securely without the stakes interfering with the concrete edge.
- Strip all sod, topsoil, and root material. In heavily vegetated yards, you may need to go 10–12 inches deep to clear the organic zone.
- Dispose of organic material off-site. Do not bury it along the perimeter where it will decompose and undermine your edge.
Grading the Bottom of the Excavation
The bottom of your excavation should not be perfectly flat. It should follow the same 1–2% slope you will build into your finished slab surface (more on this in Phase 5). Grading at the subgrade level means you use less gravel to achieve the finished slope.
Phase 3: Soil Compaction — The Step Most DIYers Skip
Once the hole is dug, you are staring at what engineers call the “subgrade.” In Vancouver, the subgrade is everything. The Lower Mainland’s geology is far from uniform, and the type of soil under your slab determines exactly how much preparation it requires.
Know Your Lower Mainland Soil Type
Richmond and Delta: Much of Richmond sits on Fraser River silt and marine sediment. These soils have low bearing capacity and retain moisture aggressively. If you are pouring in Richmond, expect to add 2–4 extra inches of structural gravel beyond standard recommendations. Ready-mix concrete delivery in Richmond requires special attention to mix design as well — your concrete supplier should know the site conditions.
Surrey and South Langley: Surrey soils are often a mixture of glacial till and clay. Clay expands when wet and contracts when dry, creating seasonal movement that stresses slabs. Concrete projects in Surrey benefit from a thicker gravel base and attention to perimeter drainage to prevent clay swelling from lifting slab edges.
North Vancouver and Burnaby: Rocky, well-drained soils provide excellent bearing capacity. Your subgrade prep is simpler here, but you may need a pickaxe or even a rental rock breaker to level high spots.
Coquitlam and the Tri-Cities: A mix of till and silt, generally manageable with standard compaction procedures.
Compaction Technique
Soil contains air pockets. A plate compactor drives them out, interlocking soil particles and creating a dense, stable base.
- Run the compactor over the bare subgrade in overlapping passes — treat it like mowing a lawn.
- Make a second pass perpendicular to the first.
- The test: your footprint should leave no more than a 1/4-inch indentation. If you sink deeper, compact again.
- Moisture content matters. Bone-dry dust won’t compact — the particles slide past each other. Lightly mist the soil until it holds its shape when squeezed in a fist without crumbling or oozing water.
- Spongy spots are a red flag. Soft, bouncy areas in Vancouver’s wet climate often indicate buried organic matter or a high water table. Excavate 6–8 extra inches, fill with clean structural fill or 3/4-minus gravel, and compact in 2-inch layers.
Phase 4: Installing the Gravel Sub-base and Managing Drainage
The gravel sub-base is the layer between compacted soil and the underside of your slab. This is the most consequential step in how to prepare ground for a concrete slab that lasts decades.
Why 3/4-Minus Crushed Gravel?
Crushed gravel with “fines” (the small angular particles and dust produced by crushing) creates a lock-and-key interlocking effect when compacted. Round river rock or pea gravel does not. The fines fill the voids between larger particles, producing a rigid, load-distributing layer.
Drainage: Gravel provides a capillary break. Water moving upward through the soil by capillary action hits the gravel layer and disperses horizontally instead of wicking into your concrete. In Vancouver’s wet climate, this is essential.
Load distribution: The gravel base spreads the weight of your slab — and everything on it — across a larger surface area of subgrade, reducing point loading and differential settlement.
Sub-base Installation Steps
- Pour gravel in 2-inch lifts. Do not dump the full depth at once.
- Compact each lift fully with the plate compactor before adding the next.
- Check your depth with a tape measure at multiple points. Inconsistent gravel depth leads to an uneven slab surface.
- Wet the gravel lightly between lifts if it is dry and dusty.
- Rake the final surface smooth and level it to your planned grade.
Phase 5: Formwork and the Critical 1% Slope Rule
Forms are the molds that give your slab its shape. They also establish the final surface elevation and slope. If your forms are not straight, level, and properly sloped, no amount of skill during the pour will fix it.
Building Your Forms
- Use 2×4 lumber for 4-inch slabs and 2×6 lumber for 6-inch slabs. The lumber face becomes the finished slab edge.
- Drive stakes every 2 to 3 feet on the outside of the form boards, flush with or slightly below the top of the form lumber.
- Use screws, not nails. Screws allow you to strip the forms cleanly 24–48 hours after the pour without hammering, which can damage green concrete edges.
- Check for level across the form width with a 4-foot level or laser. Check for straightness along the length with a string line.
- Corner joints should be butted and screwed, with stakes at each corner.
The 1% Slope Rule — Non-Negotiable
Water must always drain away from structures. A perfectly flat slab will pool water, accelerate surface deterioration, and create winter ice hazards.
- Target 1% to 2% grade, which equals a 1/8-inch to 1/4-inch drop per linear foot.
- Set the high side of your forms against the building foundation and slope outward.
- Verify slope with a digital level or by running a string line and measuring the drop at intervals.
For large commercial pours, foundation pads, or multi-slab industrial projects where precision formwork is critical, Vancouver Ready Mix’s full concrete services can support the project from mix design through delivery.
Phase 6: Reinforcement — The Skeleton Inside the Slab
Concrete is extraordinarily strong in compression — it is extremely difficult to crush. But it is weak in tension — pulling or bending forces cause it to crack. Reinforcement provides tensile strength.
Rebar vs. Wire Mesh
Welded wire mesh (WWM) is acceptable for lightly loaded slabs: patios, garden paths, and shed bases where pedestrian traffic is the primary load. Use 6×6 W1.4×W1.4 mesh.
Rebar is required for driveways, garages, and anything that will bear vehicle weight. Use #3 bar (3/8-inch diameter) for residential driveways in an 18-inch grid, or #4 bar (1/2-inch diameter) in a 12-inch grid for heavier loads.
Fiber reinforcement is increasingly common in residential work. Synthetic polypropylene fibers blended directly into the concrete mix reduce plastic shrinkage cracking during the curing phase. Ask your concrete supplier about fiber-reinforced mixes — it is not a replacement for rebar in structural applications, but it is an excellent supplement.
Rebar Placement: The Most Common Prep Mistake
Rebar sitting on the gravel does nothing. For reinforcement to work, steel must be embedded in the concrete, not resting below it. Use plastic or concrete rebar chairs to elevate the steel to mid-depth of the slab — approximately 2 inches from the bottom in a 4-inch slab.
Choosing the Right Concrete Mix Strength
Not all concrete is the same. Mix strength is measured in megapascals (MPa) — a measure of compressive strength at 28 days. Choosing the wrong MPa wastes money or compromises durability. The Vancouver Ready Mix MPa explained guide breaks down exactly which mix is right for which application, from 20 MPa walkways to 35 MPa structural slabs.
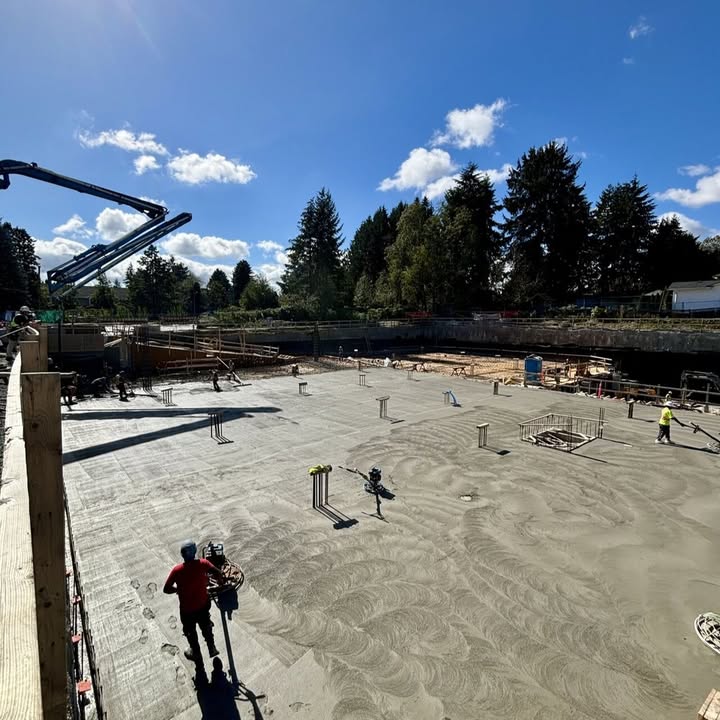
Phase 7: Preparing for Ready-Mix Delivery Day
The prep is done, the forms are straight, and the rebar is set. Now you need to be ready for the truck. A ready-mix truck weighs up to 30,000 kg fully loaded and operates on a tight schedule. The window between the truck arriving and concrete becoming unworkable is roughly 90 minutes.
Site Access Requirements
- A minimum 10-foot-wide, firm access path is required for the truck to approach the pour location.
- Overhead clearance of at least 14 feet for power lines and tree branches.
- Ground conditions must support the truck’s weight. Freshly graded soil may not. If access is questionable, a concrete pump can extend reach up to 30–40 metres from where the truck parks.
- Mark any underground utilities, irrigation lines, or drainage pipes that run near the access path.
Crew Requirements
Concrete cannot wait. Have your crew confirmed before the truck arrives:
- One person on the chute directing flow and managing spread
- One person screeding — dragging the screed board to level the surface to the top of the forms
- One person floating — smoothing the surface with a bull float immediately behind the screeder
- One spotter keeping communication open with the driver
For high-performance ready-mix concrete delivery including pump truck options, scheduling, and mix selection for your specific project, Vancouver Ready Mix handles the logistics so you can focus on the pour.
Weather Considerations for Vancouver Pours
Pouring in light rain is generally acceptable — the surface can be finished normally. Pouring in a heavy downpour is not. Rain hitting fresh concrete dilutes the surface paste, weakens the finish layer, and causes pitting.
- Ideal temperature range: 10°C to 25°C
- Cold weather caution: Below 5°C, concrete hydration slows dramatically. Use a heated enclosure or accelerated admixtures. Do not pour on frozen ground.
- Hot weather caution: Above 25°C, concrete sets faster. Order earlier in the day and have extra finishers on standby.
Phase 8: Curing — The Most Neglected Phase
Curing is not “waiting for concrete to dry.” Concrete does not dry — it undergoes a chemical reaction called hydration that requires moisture to continue. If you let fresh concrete dry out in the first week, you are cutting its ultimate strength by 30% or more.
Curing Methods
Wet curing: Spray the surface with a garden hose once it is firm enough to not wash out (usually 6–8 hours after pour). Cover with burlap, damp hessian, or curing blankets. Keep it wet for a minimum of 7 days.
Curing compound: Apply a spray-on curing membrane immediately after final finishing. The compound seals the surface and retains moisture internally. This is the most common method for residential driveways.
Plastic sheeting: Lay 6-mil poly over the finished slab immediately after bleed water has evaporated. Seal the edges with lumber or sandbags to trap moisture.
Curing Timeline
| Milestone | Timeframe |
|---|---|
| Surface firm enough to walk on | 24–48 hours |
| Light foot traffic permitted | 48–72 hours |
| Forms can be stripped | 24–48 hours |
| Vehicle traffic (passenger cars) | 7 days minimum |
| Heavy vehicle traffic | 14–28 days |
| Full structural strength (100%) | 28 days |
Do not accelerate this timeline. Driving on a slab at 3 days because it looks hard is one of the most common causes of premature surface cracking and scaling.
Frequently Asked Questions (FAQ)
How thick should a concrete slab be?
For most residential applications like walkways or shed pads, 4 inches is the standard. For driveways intended for heavy trucks or RVs, 6 inches is highly recommended.
Can I pour concrete directly on dirt?
Technically yes, but we never recommend it. Dirt shifts and retains moisture. Without a gravel sub-base, your slab will likely crack within the first two years. Learning how to prepare soil for concrete slab pours specifically involves adding that gravel layer.
Do I need a vapor barrier?
If the slab is for an interior space (like a garage or basement), yes. A 6-mil poly barrier prevents moisture from the ground from “wicking” up through the concrete and ruining flooring or creating mold.
How long does a concrete slab take to cure?
You can usually walk on it after 24–48 hours. However, it takes 28 days to reach its full structural strength. Do not drive a vehicle on a new slab for at least 7 to 10 days.
Conclusion
Mastering how to prepare a concrete slab is about discipline. It is tempting to rush the excavation or skip the compaction to get to the “fun” part of pouring concrete. However, 90% of concrete failures happen because of the 10% of work that happened before the truck arrived.
By following this guide—clearing the organics, compacting the subgrade, and ensuring proper drainage—you are guaranteeing a project that adds value to your property for decades.
Ready to start? Vancouver Ready Mix provides the highest quality residential and commercial mixes tailored to your specific project needs.